Another option is to use the Signature Line item in Excel 2013. This allows you to add a line for a signature that was designed specifically for that purpose, and it has the added benefit of looking a little more professional. Our tutorial below will show you how to add a signature line in Excel 2013.
How to Insert a Signature Line in an Excel 2013 Spreadsheet
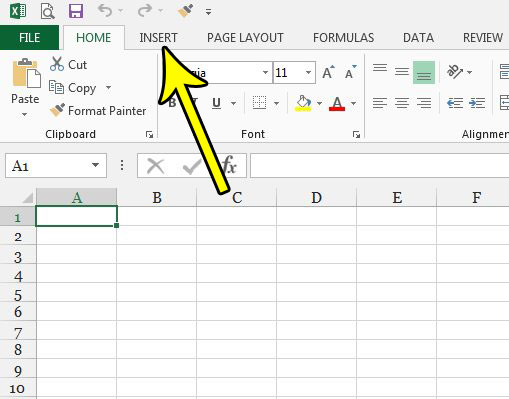
The steps in this article will show you how to add a signature line to a spreadsheet in Excel 2013. Once the signature line has been added, others will be able to sign on that line, such as with a digital signature, if that is something that you wish to include in the spreadsheet. Note that you will need to save the spreadsheet to a file type that is compatible with digital signatures, such as the standard .xlsx file type. Step 1: Open your spreadsheet in Excel 2013. Step 2: Click the Insert tab at the top of the window.
Step 3: Click the Signature Line button in the Text section of the ribbon.
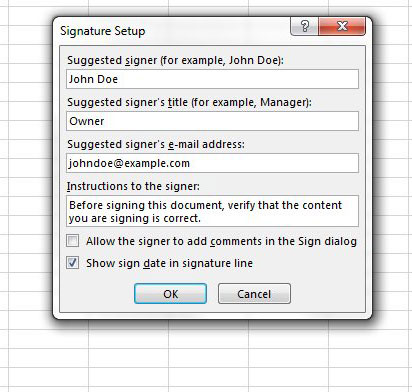
Step 4: Fill in each of the lines on this window that you wish to include with the signature line, then click the OK button.
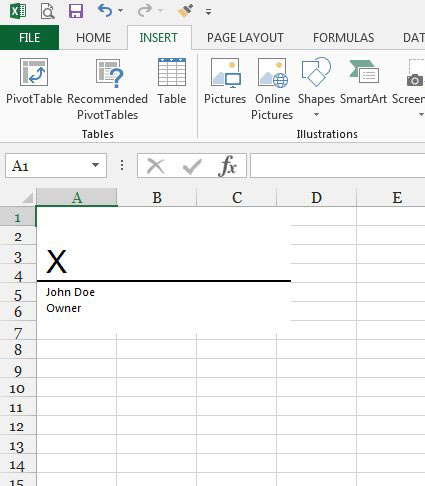
Your spreadsheet will then have a signature line that looks like the image below.
Your recipients will be able to type their name or include a signature image to sign at this location. If you wish to use a digital signature then you will need to use one of the services outlined in this Microsoft article. Is the data in your spreadsheet sensitive? This article will show you how to require a password to view an Excel spreadsheet so that only the people to whom you have given the password will be able to view the data it contains. He specializes in writing content about iPhones, Android devices, Microsoft Office, and many other popular applications and devices. Read his full bio here.