Run the System Performance Report
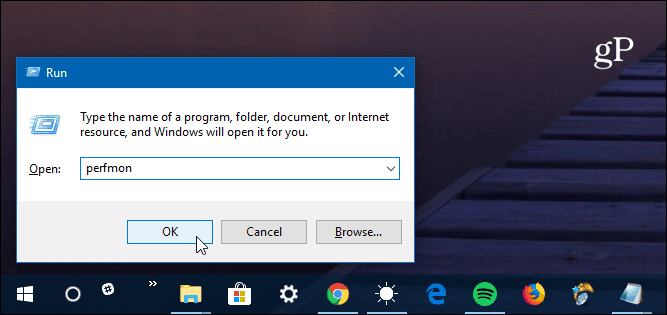
To start, hit Windows Key + R and type: perfmon and hit Enter or click OK.
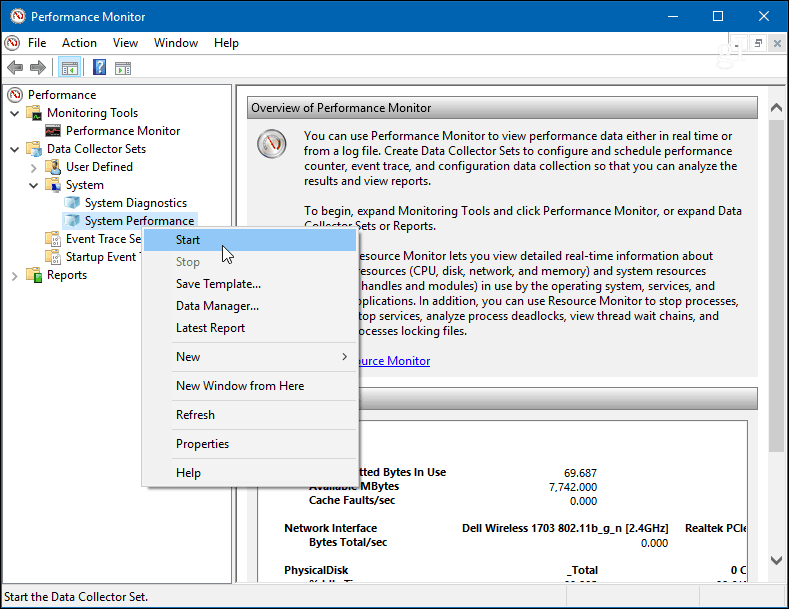
From the left pane of the Performance Monitor app, expand Data Collector Sets > System > System Performance. Then right-click on System Performance and click Start.
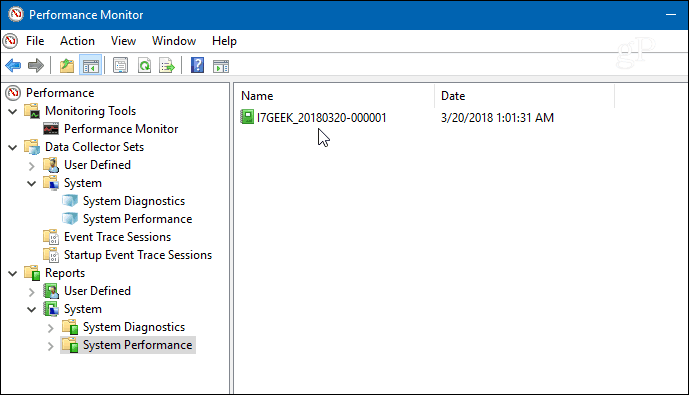
That will kick off the test in Performance Monitor. It should only take about a minute to run, but your mileage will vary depending on your system. While it’s running, you will see an icon next to System Performance letting you know it’s running. When it’s finished, in the left pane, head to Reports > System > System Performance.
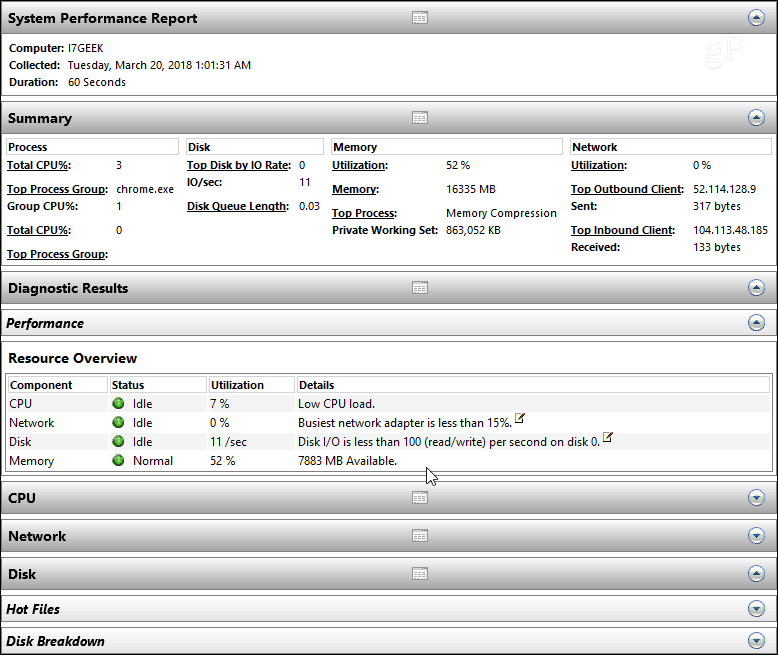
Go ahead and double-click the report to open it, and you’ll find it provides an overall system summary, and you can drill further down into components like Disk (local drive data), CPU, and Network. Each section provides a ton of information regarding all aspects of your PC.
Whether you are troubleshooting a specific issue or want to do some preventive maintenance, running a System Performance report on your Windows PC is a great place to start. It’s also a good way to create a history to keep track of issues over time. There is a lot packed into the Performance Monitor tool. Over the coming weeks, we’ll be taking a closer look at some of its other features like collecting custom log file data, defining alerts, generating other reports, and more. Have you run a System Performance test before? What are your favorite tools to help troubleshoot PC issues? In the comments below, let us know or hop in our Windows 10 Forums for additional discussions and troubleshooting advice. Comment Name * Email *
Δ Save my name and email and send me emails as new comments are made to this post.
![]()


