Now, however, it’s possible to wirelessly connect to compatible displays and view your laptop content on the larger screen. Our tutorial below will show you how to connect to a wireless display from a Windows 10 computer.
Connecting to a Display Wirelessly in Windows 10
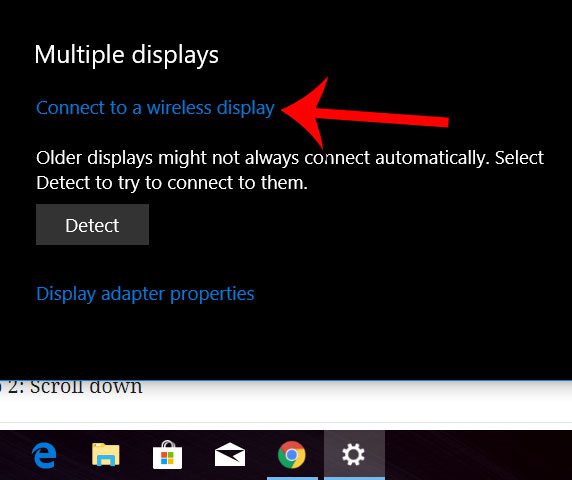
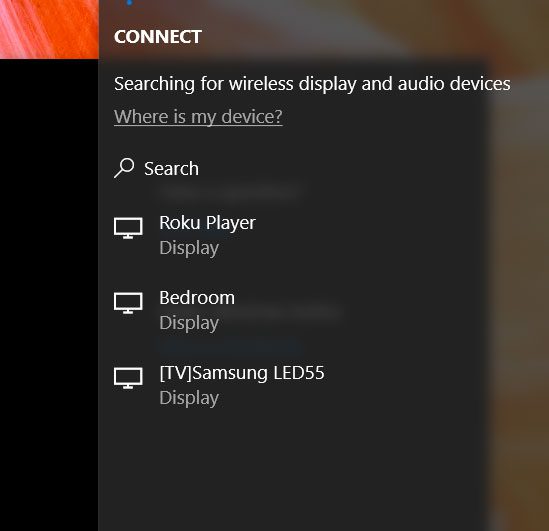
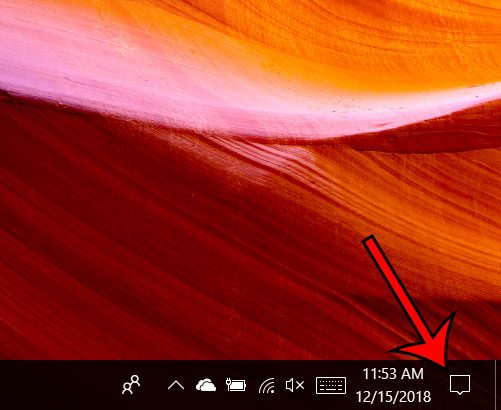
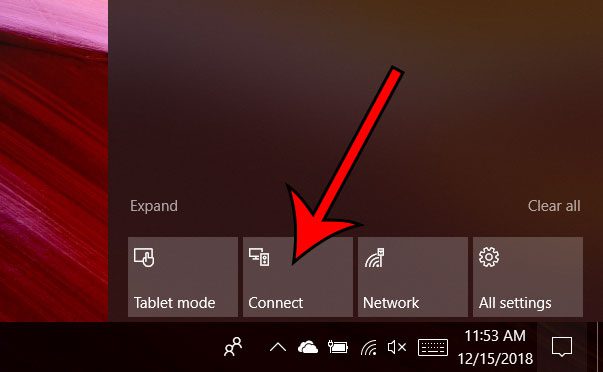
The steps in this article were performed on a laptop computer running the Windows 10 operating system. Note that you will need to have a display capable of handling this type of connection for this to work. If there is a nearby display that is capable of making this connection it will show up on the list in the steps below. Step 1: Right-click on the desktop, then choose the Display settings option. Step 2: Scroll down and click the Connect to a wireless display option. Step 3: Click the display option in the right-hand column to which you would like to connect. Note that this can take a few seconds, and you will usually need to confirm this attempt to connect wirelessly on the target display. You can also complete this wireless display connection by clicking the Notifications button in the taskbar. The selecting the Connect option, which will show you the list of available displays that we saw in step 3 above. Would you like to display a touchscreen keyboard so that you can more easily type when in touchscreen mode? Find out how and make your touchscreen laptop much more useful for performing actions on the device. After receiving his Bachelor’s and Master’s degrees in Computer Science he spent several years working in IT management for small businesses. However, he now works full time writing content online and creating websites. His main writing topics include iPhones, Microsoft Office, Google Apps, Android, and Photoshop, but he has also written about many other tech topics as well. Read his full bio here.
You may opt out at any time. Read our Privacy Policy


